
Lessons
Transcript
How do you get your videos noticed in a world so saturated with content? In this course, you’ll learn how to stand out from the crowd with excellent content.
We’ll cover: how to get your video noticed online, how to add pizzazz to your video with color, sound design, and graphics, how to hook, retain, and engage your audience, advice for working remotely as a content creator.
Let’s make it pop.
Transcript
Hey friends, it’s CameraGirlHelena here, and today we are going to talk about the process thanks to which the viewer evaluates the quality of your product. I’m talking about color grading. So, let’s start.
First, we should understand what is color grading. The wiki says: is the process of improving the appearance of an image or presentation in different environments on different devices. Simply put, this is any decoration of your picture. People often confuse color grading and color correction. Nowadays color correction is a more technical process. It makes your shots look “right,” with colors adequate to real life as you can see on the example. However, grading is activity that is more creative. With the beginning of the digital era, filmmakers can easily use the colors of the picture as more of a creation tool. Sometimes it helps sometimes not. But anyway, the skill of color correction is necessary for every person involved in the visual arts. Now let’s talk a bit about some theory terms of color grading. This basic knowledge will give you the opportunity to navigate our subject better.
So, first is calibration of the monitor. You might notice that time to time a picture looks not the same on different screens. Sometimes it happens because of low quality of the monitor, sometimes because of long time usage, sometimes due to incorrect settings. But this problem can be solved with help of any kind of collaboration tools. They can be software and hardware. Of course, you can use only test images, but it is not really effective. I recommend everyone involved in visual arts to calibrate monitors with help of hardware equipment. Special photo element is checking the colors, comparing them with the reference, and correct the color profile of the display in the application. This tool is not very expensive. So you can choose that one which is supportable or even calibrate the monitor in any service center. Your work will be much easier in basic colors you see on it are correct with the general reference. This way you will be much more self-confident.
Second thing is color format. Nowadays, almost every camera including smartphones can work with format called LOG. So, what is it, and how we can improve the level of our frames made with it? A LOG, or logarithmic footage, is flat footage that contains more details of the image. In LOG footage the purpose is to capture highlights, shadows, and whites with getting the most out of the camera’s dynamic range. But what is missing in this recording mode are colors. So it’s necessary to calibrate the LOG footage in post to get the colors back into the image.
Speaking about the colors we should know about Rec. 709. It’s a specific organization of colors called a color space which produces realistic images. They have a good amount of contrast and saturation. Unlike LOG footage that is somehow colorless, Rec. 709 is close to the linear color space. You can consider this format as a result of color correction. Except Rec. 709, we should know about the LUTs or lookup table. It is a conversion table of color data that changes the colors of the footage in many ways. Simple put, this is a transition mechanism from a low contrast gray pattern to a stylized one. In a broad sense, it is your Instagram filters, but with really great variability. And the last thing I want to mention is RAW. This format contains the most information but it is really heavy and needs powerful editing equipment.
The third instrument of grading are video scopes. In general, there are four main scopes, waveform, parade, vectorscope, and histogram. Using them you can make a right color skin tone and also make your shots match to each other. Working with video scopes is a really big step of improving yourself as a colorist. You can learn more about working with video scopes in the course. Other necessary things are the main instruments of basic grading: brightness, contrast, hue, and saturation.
Brightness can be defined as, “the amount of energy output by source of light, relative to the source were comparing it to.” In some cases, we can easily say that the image is bright, and in some cases, it is not easy to perceive. Contrast can be simply explained as the difference between maximum and minimum pixel intensity in the image. Hue is determined by the dominant wavelength of the visible spectrum. It’s the attribute that permits colors to be classified as red, yellow, green, blue, or an intermediate color. Saturation pertains to the amount of white light mixed with a hue. High saturation colors contain a little or no white light at all.
And the last thing I need to mention in theory part are color wheels and curves. These are the two most often used instruments of the professional color grading. You’ll see how they work in the practical part. Basically, the wheels divide one image to the black, gray, and white parts that can be graded separately. Curves give us the ability to work separately with general red, blue, and green channels.
So that’s probably all the theory I wanted to talk about. We’re ready to create something interesting. But before we started the practice part, I want to recommend you Artgrid. This is a free website where you can find an incredible number of stock footage connected to any topic. It has comfortable menu and ability to download the files in different formats from HD to RAW or LOG file without grading. Here I’ve found some footage and we’ll work with them for the entire course. Premiere Pro has a powerful color grading instrument called Lumetre. It is divided into six main sections. So it doesn’t matter what image processing or video editing software you’re coming from. You should be comfortable working on your color correction in Premiere using at least one of these sections. Let’s take a closer look at each one. By the way, you can do it also in another program and the user interface is usually pretty similar. Let’s start with the basic color correction section.
This first section of the panel is based on panels in Lightroom and Adobe Camera Raw, so it’s easy to get started. This is where most people work when they do their color correction and grading. Most of the sliders are self-explanatory, but a couple are worth specifically addressing.
Input LUT. This is where you add your technical LUT to get your footage into the rec 709 color space. If your footage is long or uses custom camera settings, you can add an input LUT before you start adjusting the controls. This will make the colors in your image look normal and the sliders will work as expected.
The white balance selector, the eyedropper, can help fix the white balance in the clip. Click it and then pick an area in the picture that’s supposed to be white. Sometimes we may have trouble finding a perfectly neutral area in footage. On some clips, mainly when you have obviously white areas, it will work just fine. Under the white balance controls, you will find the tone sliders, they should be very easy to understand. They control exactly what their names indicate. You have exposure, contrast, highlights, shadows, whites, and blacks indicators. Even though they are placed at the bottom of the stack, whites and black adjustments are applied before the other sliders.
Here’s the creative section. Here we’ll have a little drop-down menu where you can apply the LUTs that you put into your creative folder. You can choose a LUT from the drop-down menu or browse them using the arrows pointing left and right and then click the previous thumbnail to apply the LUT. If your favorite look is not released, click browse and point to the folder where you keep it. The preview you see in the thumbnail shows the LUT applied to the original footage ignoring other adjustments you have done to it. The Faded Films raises the blacks and lowers the whites for a duller look. The vibrance slider adjusts saturation but avoiding the already saturated pixels and skin tones in order to avoid over-saturated colors.
Let’s check the Curves section. In this section, you can work separately with the different color channels: white, red, blue, and green combined with the RGB parade scopes. The RGB curves is it really useful to make color correction in Premiere. In addition, the hue saturation curves give you independent control over the saturation of every color. Making it very fast to adjust the greens in foliage or to add saturation to the sky to make it pop. As with other controls in Lumetre, just double-click to reset the individual curves.
The color wheels and match section. With the three-way color correction you can adjust the brightness, hue, and saturation for shadows, mid-tones, and highlights independently. All the adjustments from the color match feature are done in this section. To make the shadows darker, drag the slider down and drag it up to make the shadows lighter. The controls for mid-tones and highlights work the same way.
Okay, let’s move to HSL secondary section. This section lets you create interesting looks. Make your viewers focus on the right parts of the image and so on. You can select pixels within a selected range of use of hues, saturation, and lightness and adjust only those pixels. To do the initial section you can click one of the color buttons or use the left eyedropper. Then you can use the plus and minus eyedroppers to add and remove pixels from the section. You can also drag the blur slider to soften the mask if the edges get a bit harsh. Choose white black, color black, or color gray to see the pixels selected by your mask. The view that the best shows your selected pixels will depend on the footage.
Dragging the sliders in the key section we are able to make a better selection. After you have picked the colors you want to change to the eyedroppers you can adjust the sliders of the hues, saturation, and levels to select a wider or narrower range of pixel values.
Use the de-noise a slider to get rid of any small specks in the key mask. If you’re HSL keying, you should do this pre-effects or immediately after the input LUT. Changing the color, sharpness, and so on shouldn’t affect the key. It works based on the original pixels.
And the last is that vignette section. In the vignette section, you’ll find sliders for the amount of darkness or lightness the vignette should have, the midpoint, the roundness, and the feathering. It’s time to check the result.
So that’s how the color grading works. It always helps you to make something unique and surely to improve the level of your footage makes it look really cool. Hope you enjoyed our lesson. I’m CameraGirlHelena. That’s all and till next time.
Transcript
This time I’m going to talk about the process that could be not really noticeable at first, but is actually important for the good final result of your video. I’m talking about sound design. If we check the Wikipedia, we’ll find out that sound design is, “the art and practice of creating soundtracks for a variety of needs.” It includes the process of creating auditory elements using audio production techniques and tools. It is used in a variety of disciplines including filmmaking, television, music creation, video games, and others. In other words, sound design is all the work which result we can hear in any artwork, from stories in Instagram to classical opera.
So why do you need to improve your level of sound design? I can give you a lot of reasons but first, and the most important is unlike watching, listening is an ongoing process of communicating with the world. People judging your video will be more critical to a sound design because its technologies are more developed than the visual ones. As always, let’s begin from the theory.
From the point of video production, we can divide sound design into three elements: music, speech, and sound effects. Let’s take a closer look at the music. Music is the art of arranging sounds in time for producing a continuous unified and evocative composition through melody harmony, rhythm, and timbre. Melody, also called a tune, is a series of notes sounding one after the other, often in a rising and falling pattern. The notes of the melody are usually created with help of pitch systems, such as scales or modes. Melody often consists of nodes from the chords used in the song, so it is the main line will most often remember when you think about any song.
Harmony includes pitches that are played together at the same time to create a chord. Simply put, harmony produces the mood of the song. Will it be happy and so on with a major? Or sad and melancholic with minor?
Rhythm is the arrangement of sounds and silences in time. Meter animates time in regular pulse groupings is called measures or bars. In western classical popular and traditional music, they often group notes in sets of 2/4, ¾, also known as Waltz time, or 4/4. Also important thing about the rhythm is track speed or beats per minute.
So let’s remember the rhythm as the engine of the music. Timbre, sometimes called “color” or “tone color” is quality or sound of a voice or instrument. Timbre makes musical sound different from another even though they have the same pitch and loudness. Physical characteristics of timbre are spectrum, envelope, and overtones of a note or musical sound. We will call it the uniqueness of the music. So remember, when you choose the music for your video you should consider the main line, mood, engine, and uniqueness of the musical composition.
Let’s move forward and talk about even more important thing – speech. This is a broad topic so we’ll focus on the most important details. First thing is voice recording. If you decide to start recording your voice for the videos, I am really proud of you because it’s a brave step. On the other hand, you should improve your personal level of speech every day and always strive to the best. As I said before, people listen to you more attentive than watch.
Next thing is equipment for voice recording – microphones. They vary in shape and size, from tiny to pretty big, and convert sound into electrical signals. Sometimes, audio engineers classified up to 15 types of microphones. But you should remember the two most common: dynamic and condenser. The difference between them is really noticeable for nonprofessionals.
A dynamic microphone could be called plug and play. It doesn’t need to be powered. Simply plug a dynamic mic into an active speaker and the microphone will work. Comparatively a condenser microphone needs to be powered. The industry standard term for this is phantom power. For example, you can connect a condenser microphone to a speaker without powering it first. Condenser microphones can be split into large and small diaphragm condenser. Large-diaphragm often are very sensitive and able to catch extremely detailed sounds. That’s why you can choose them for studio recording, especially for vocals. Small diaphragm mics often work well on acoustic instruments and recording groups. They can be used in live and studio. As the name suggests, they tend to be smaller.
Dynamic mics are used for live performance and sound reinforcement. Also, when there’s a loud sound source. They tend to be less susceptible to feedback. So they are mainly chosen for live vocals. If you want to record a voice without unwanted sounds, you’ll better use a dynamic microphone with narrow signal catching.
But for the better, more colorful sound, I would recommend you to use some condenser microphone. I recorded my voice with Synco Mic D2. It is a condenser microphone and result you can hear right now.
Okay, we know about music and voice basics. Let’s talk about last but not least thing of sound design. I’m talking about sound effects or SFX as it’s called shortly. Sound effects is any sound other than music or speech, artificially reproduced to create a dramatic effect. For example, the sound of a storm or a crack in the door.
There are two categories of SFX: sounds that you add to the audio sequence and plugins that change the existing sound in a special way. Typical effects that are used for recording performances in music and film television production are echo, which includes reverb and delay, chorus, equalization, filtering, overdrive, pitch shift, compression, and many others. We will stop on the main audio plugins in detail in the practical part of the lesson. If we talk about the songs that can be used in the video, then there are two ways. Record them by yourself or use special libraries. So guys, let’s start the practice part of the sound design in Adobe Premiere Pro.
Similar to the Lumetri color controls, there are various categories of effect controls that you can expand or collapse. We can choose between dialogue, sound effects, music, and ambiance categories. If your clip contains dialogue audio data, you can use the options under the dialogue tab in the essential sound panel to repair the sound by reducing noise, rumble, hum, and ‘ess’ sounds. Some of the methods used for improving dialogue, audio clarity are compressing or expanding the dynamic range. Also adjusting the frequency of the recording and processing all the enhanced voices. Premiere Pro allows you to create sound effects for your audio. SFX helps you create illusions, such as music, which sounds like it comes from a particular position in the stereo field, or an ambiance of a room with appropriate reflections and reverberation. And auto-ducking for automatic computation of keyframes.
Let’s lower the volume of background sound against a foreground sound. First thing we’re going to work with is editing the music and mixing it with the video. It is really important to choose the right track for your video. And the most important is the mood of the soundtrack. On Artlist you can choose it with help of special columns. It is really useful. Next, depending on your shot’s length and your idea, we select the speed and the main theme of the track. After this, we should make some editing for the best match.
Someone can tell that music track should be placed after a ready-made video sequence with all sound effects. But if we’re working with an ultra-short format for social media, I will still recommend you starting with music because it’s often the only sound in the video.
Now we’ll work with sound effects. Let’s add some details for more interesting effect. It is very important to overlay sounds according to what is happening in your frame. Since it is happening in someplace we can add sounds from ambient noise. Sound Design is an art which gives you the practice of creating soundtracks for a wide variety of needs. Use audio transitions to fade in the sound. It can look more natural.
Next, we’re going to add some speech. Premiere Pro allows you to record a voiceover directly into a sequence while the sequence plays. Here what do we have?
“Do you believe in miracles? Well, you should.”
We can automate loudness of the speech repair it with the most common restoration instruments, add some compressor and EQ reverb. And now sounds much better.
“Do you believe in miracles? Well, you should.”
And all your sound mix is becoming much better.
“Do you believe in miracles? Well, you should. In fact, life itself is a big miracle. There are two ways to live. You can live as if nothing is a miracle or you can live as if everything is a miracle.”
So that’s how the sound design works. It gives you a possibility not only to demonstrate your video but also make it more atmospheric and hook a wider audience. Hope you enjoyed this tutorial. I’m CameraGirlHelena. That’s all and till next time.
Transcript
We’re coming back to our course to talk about the processes of visual effects. It’s a really interesting topic. So let’s go. As always, we’ll start with an explanation of the term visual effects. Visual effects are the processes that help you to create images outside the context of a live shot in video production. And integration of live-action footage and CGI elements to create realistic image is called VFX. VFX with CGI became available to independent filmmakers with advent of affordable and easy-to-use animation and compositing software.
Basically, we can split all visual effects into big groups: informing and embellishing. The first group gives you extra information about the video. It consists of titles, subtitles, lower thirds, and any verbal or nonverbal signs that helps you to understand a video content better. The second group includes some objects that help you create a new aesthetic theme. It can be any effect – any 2D or 3D objects, still or animated. And all transitions between frames. As we talk about the basics of VFX, let’s talk about title, subtitles, lower thirds, basic animation, and transitions.
So what is the title? A title is any kind of text which you can see in the video. It is used to identify the content, put it in the context or tell a synopsis of it. There are a few sorts of titles. The first is subtitles. It is a verbal expression that duplicates the speech of the speaker. The subtitle is often used for translation or dubbing. Some kinds of subtitles can explain thoughts of the character, or even surrounding sounds. Another kind of title is lower third. In TV production, a lower third is a graphic placed in the lower area of the screen. Usually, the text is white color with a shadow to make it easier for reading. Lower thirds includes graphical elements such as boxes, images, or shading. Some lower thirds can be animated.
Animation is a method of vigorous manipulation to simulate the movement of images on the screen. Basic animation combined with shots, it’s adding some still or animated frames into the video. It can be still or moving with help of programmed position controls or some instruments like a 2 or 3D tracker.
And the last in the theoretical part are transitions. Transition is a post-production technique used in video editing to connect one shot to another. Transitions also can be used in the movies to express the mood, show the passage of time, or connect different parts of the story. Such transitions include dissolves, L-cuts, fades (usually to black), match cuts, and wipes. We will talk about them in the practical part. No matter if you’re a beginner or pro in video making, it’s always great to improve your creativity. That’s why I recommend you a Motion Array. It’s a website with tons of unlimited video assets for content creators. Templates, presets, motion graphics, and even plugins will be really helpful for your projects.
And now it’s time to add some graphics to our project. We will send materials to After Effects with help of dynamic link. We will start from work with the text elements. After Effects offers a wide range of great options for formatting and customizing text. We will use the Character panel to format characters. To display the Character panel choose Window, character, or with a type tool selected, click the Buy Now button in the Tool panel. To reset character panel values to the default values, you choose Reset Character from the Character panel menu.
First, we’ll work with the fonts menu. A font is a complete set of characters, letters, numbers, and symbols that share a common weight, width, and style. You can use the font menu in the Character panel to choose font family, style, size, color, and set some fonts as favorites. Then let’s go to the space in between characters and lines. Here we can work with leading, kerning, and tracking values. Leading is the space in between the lines of text. Kerning is the process of adding or subtracting space between specific letter pairs. Tracking is the process of creating an equal amount of spacing across a range of letters.
Next, we’re going to fills and strokes. For the text, a fill is applied to the area inside the shape of an individual character. A stroke is applied to the outline of the character. Horizontal scale and vertical scale specify the proportion between the height and width of the text. It is not recommended to use because each one has its own proportion. If you want to change the size of the font, you should use the font scale. Baseline Shift controls the distance the text appears from its baseline, either raising or lowering the selected text to create superscript or subscript. Then, the last line with bold, italic, all caps, small caps, superscript, and subscript buttons.
So now we can type some intro and outro. But still, the text is a little bit boring, so let’s animate it. We can do it manually but After Effects has a lot of animation presets for that. Let’s try some of them. To choose the right one we will use Adobe Bridge. We can go there through the panel menu button, then browse presets, and here we are. Now we can choose and modify the most suitable. We can leave as it is or make our titles even better. That’s why I’m going to Motion Array for a cool template for our text. I like this one. It was made special for quotes.
Next, we’re going to work with transitions. In After Effects we have a list of transition effects and presets. To browse them we can use Adobe Bridge the same way as we’ve done with Text tools. So let’s choose and add some transitions. But what if we don’t find a suitable transition? After Effects gives you the opportunity to add some new templates or presets from third-party companies. That’s why we’re going to Motion Array to watch some other cool transitions. They can be found in the templates or presets page if you choose After Effects as a program.
Let’s download these presets and add them to the program. Most authors put the information of the right usage on their packs. So now we can add this transition to our composition. I downloaded overlay with light leaks, and we’ll use it as a transition. I added it to our composition, changed the rotation, scale, and opacity. Now we have something like that. I think it looks great. Also, I chose vintage film transition from the library. Now it looks like that.
And here’s our final result with titles and all transitions. So that’s how the basic graphics work. Of course, it’s just a tiny part of the topic. But anyway, I hope the information was useful and you enjoyed this tutorial. I’m CameraGirlHelena. That’s all and until next time.
Transcript
Today’s lesson will be a little different from the previous ones. We will try to sum up and put into practice all the skills for optimal work in social networks. So let’s start.
This time we won’t have a long theoretical part because all of you know what is social media and why we are involved in them. Most people want to express themselves through social media, and this creates a huge competition. Therefore, the most important task for a blogger is to create content that will be interesting to the audience. In my subjective opinion, the most important success factor is the personality of the blogger. And this formation is work that requires many years of involvement and is subject only to the individual and his personal internal motivation. However, there are other factors that can help a person succeed in blogging. We can divide them into these two groups.
Our previous status dealt mainly with the first group of factors. Today we’ll try to touch on both with particular emphasis on personal factors that require greater inclusion. I mean hard specialists can shoot, edit, and even post your content, but your personality uniqueness is almost impossible to pay, especially for a long time. I ask you not to take this as hard truth, but simply as a list of useful tips from someone with some experience.
So, understanding your audience. It may seem trite to you, but practice shows that such a simple matter as choosing your own audience is often ignored or misunderstood by people who want to share their content. There can be many reasons for such carelessness. I would single out the one: that artists desire to create for himself. It would seem a great idea. You create as your heart tells you and you are not for sale. On the other hand, use the opportunity to have good advice.
Working with high-quality elements – video, audio, motion graphics, as I told you before, technical aspects are important, especially if you want to share with people some professional information.
Remember, before you who that attention, people will watch you with a critical point of view. Moreover, you should prove you’re a real key opinion leader. That is why technical and personal professionalism has a huge role, especially in the beginning of your way. keep the audience engaged with high-quality B-rolls. It might seem not to be so necessary, but extra footage will help you to tell your story better than just putting A-rolls of yourself talking to the camera.
Analyzing trends. Trends are not as simple as it looks. Some can tell you they are the main thing you should learn. Someone can say the opposite. However, the truth is always somewhere between. Analyzing trends is the obvious part of every blogger’s work. Social networks require you to repeat successful trends. But the main thing is not to make the end in itself. It is more of a certain balancing act between originality and trend following.
Making something unique. Maybe seems too general but it should be something that can help viewers to remember you and only you. For example, the simplest is to wear some unique clothes or use some unique phrases. But remember, with the least of time you will need something more serious to express yourself.
Always try something new, not repeat the same content many times. It is a huge problem of creators. After getting some success. They try to repeat it with the same methods and techniques. The result is a constant self-repetition which is not only boring for viewers but also reduces critical thinking and kills creativity.
Giving not only entertaining but also educating, helpful, developing material. This is not the obvious condition of hooking the audience, but you should always remember – the creator is responsible not only for his creation but also for those who consume it. Therefore, it is desirable to educate and develop your own audience while developing yourself.
Still on the topic of your video in the first five seconds. This advice you may hear very often. I won’t dispute this thesis but I’ll add on my own behalf that the content being sold should be clear, understandable, and ironic enough to catch the attention of the audience.
Hooking with hashtags and geolocation. That advice is more about the technical than the personal factor of hooking. Nevertheless, I put it here because many people are hesitating about working with all the instruments inside of a social network. I insist that you shouldn’t be embarrassed. This toolkit is no less important of constant promotion than the content itself.
Being ready for long-term walk with the audience. It is not so difficult to interest an audience as to keep it for a long time. People with clip thinking are constantly looking for new sources of information. Therefore it is not so easy to get your own audience in short period. And in such situation, don’t despair, just continue to go into success. Naturally, with healthy self-criticism and self-irony.
This was my subjective list of advice for anyone who wants to hook the audience. It is based on my own experience right or wrong decisions I’ve made on my way of blogger and content creator. I hope this course was interesting and informative for you. I want to believe you have learned something new. So it’s time to finish. I wish you all good luck. It’s CameraGirlHelena that’s all, and till next time.
Transcript
Hi, I’m Anthony from the YouTube channel, Anthony LiPani, talking about workflow and preparation. In the beginning of your content creative career, the idea of preparation might seem a little overwhelming and confusing. It does for all of us. But one of the great parts about content preparation is, there’s no rules to follow. It’s all about what works best for you. Don’t be afraid to look at other content creators to help you with inspiration for some ideas or methods that you can add to your own repertoire. as you go you’ll pick up little techniques here and there that resonate with you, to help you increase your productivity. And you’ll slowly start to develop a solid workflow that you can rely on to help you get the job done better and faster.
Some people like to fully script out their projects, which could significantly speed up the completion of your videos. But if you’re not careful, reading the script line for line can cause you to come across as robotic and just not natural on camera. Another method is to not fully script your videos but instead use bullet points. This strategy is probably best use for somebody that’s more comfortable on camera and speaks well off the top of their head.
But just like a fully scripted video, there are some things you need to be aware of with bullet points. You’ll most likely need to redo more shots without a script than you would with one. You also have to be aware of fluff. If you’ve never heard of the term fluff before, it’s basically filler words in between your sentences that add zero value to your project. Words like ‘umm’ or ‘uhh’ as well as awkward silent seconds in between your lines are what’s called fluff, which can occur pretty often when you’re shooting from the hip. Always cut out the fluff. People’s attention spans are incredibly short, and leaving fluff in your videos is an easy way to lose your viewers’ attention fast.
Another situation you might come across when using bullet points is making a mistake that you might not realize you made while filming, but you’ll notice it later on when you’re editing your video, and by then it might be too late to redo your shot. For me, I mostly use bullet points because I’m pretty good on camera and I find that come up with funnier jokes off the top of my head during my shoot. But I will script out some super detailed projects, like an in-depth review I might be working on, or paid sponsor project, and I want to make sure I don’t leave anything important out.
Now, a little earlier I mentioned that there are no rules when preparing for your video, and I’d like to explain a little bit. Some people use an app, others like to go old school with a pen and paper. I myself like to use a notes app because most notes apps are cloud-based and can sync up with all my devices so I can access them at any time and there’s no chance of me losing what I wrote down. I find that if I use a physical piece of paper, there’s a much higher chance of me not bringing that paper everywhere I go, which will limit my filming times and also I’ll probably lose it.
When I’m writing in my notes app I script on my projects much different than I’ve seen other people write theirs. I use checkboxes for my lines like you would see for a to-do list or shopping list. It helps me not lose my place in my script and I’m able to check off my lines as I go through them. It also helps prevent me from over-explaining something, which is another good way to lose somebody’s attention fast. And if you’re the only one reading your notes, then your style of writing notes won’t matter as long as they make things easier for yourself.
Another method I use is I spell my words in a way that I know I would naturally say them. I’m an Italian city boy from Queens, New York, and as you might be able to hear, I got a little bit of an accent, so I spell my words in my script with my natural accent. For example, if one of my lines is, “what do you want to do?” I know that I’ll sound weird accentuating the T’ in “want” and “to do” So I’ll write instead, “whatta you wanna do?” to make sure I sound natural when I speak my lines because that’s how I pronounce my words. This technique helps me immensely when I’m working on a project that requires a full script.
Another great tip if you find yourself struggling on camera, is to film in a place that makes you feel more comfortable. This could be a bedroom, a basement, maybe an attic that nobody’s using. Maybe even go on a hike somewhere by yourself and just hold the camera up and speak. And don’t assume that everything you film has to be seen by the world. If you don’t like something, you can simply cut it out or completely redo it or delete it. Practicing over and over will make you feel more comfortable and help build confidence in front of the camera.
And don’t forget to speak up. Try not to mumble or some monotone. Pretend the camera is one of your friends that you enjoy having a conversation with. And if you make a mistake, just have patience until you get it right. Don’t panic. There’s been plenty of times where I’m just having an off day and my brain isn’t working as well as I wanted to. We’ve all been there. Don’t get frustrated. Just gather yourself, keep going until you get it right.
Being a creator is the same thing as going to the gym or being in a relationship. The more you put into it, the more you’ll get out of it. And there’s no better time to start than right now. Thank you for watching, and I’ll see you guys next time.
Transcript
This section of the course is about something that is very, very important to your success as a creator. It’s something that we’ve been hinting at all this time. And that’s to keep things shareable, relatable, authentic. video quality is important. Of course, sound is important. But if you don’t have an honest message that really connects with the viewer, then you don’t have the soul of great content. Despite everything I’ve said about image quality, the heart of everything’s your ability to connect with someone else. And so here are a few things that I tried to keep in mind to be as authentic as possible when I’m making videos.
And the first is to tell the truth, even if it’s ugly. there’s a temptation on YouTube to come across as perfect. This is especially true I think, in the productivity YouTuber niche where we might make a day in the life of a YouTuber video and show us waking up early and making a perfect cup of coffee being productive all day. And oftentimes, this isn’t true. In fact, one of my YouTube friends Joey, he made this video that was really successful about how to be miserable for the rest of your life in which he talked about what not to do. But he told me in private that the reason he even came up with that topic is because he had been lazy and unproductive for almost a month. He was in a bit of a rut. And so what compelled him to make this video was actually what he was struggling with, which is why I think it was so successful.
You’ll see perfectly edited videos, productivity hack videos in which people talk about their million-dollar businesses, and whatnot. But every viewer has an amazing register, barometer, for the truth. And when someone is saying something, honestly, authentically, even being a little bit vulnerable, it’s just so refreshing. We can tell immediately, they’re just speaking from the heart. They’re not BS-ing you. That will win the loyalty of the viewer more than any B-roll shot ever could.
The second principle is that you should leave things unresolved if need be. For instance, if you’re making a video about how you quit sugar for 30 days, and it ultimately didn’t lead to any great insights, just say that in the video. I quit sugar for 30 days and not that much happened. The temptation is to make every lifestyle challenge, every experience that you’re talking about seem like this transformative thing. You know, this changed my life. but one of my favorite videos from my friend Matt D’Avella was when he woke up at 5 AM every day for 30 days. And at the end of it, he said it didn’t actually make him more productive. It actually dropped his productivity because the sleep schedule and the rhythm of his life just never aligned with going to sleep that early and waking up at five and so he was actually just tired and miserable for the whole duration of the challenge.
When I heard him say that inside that video, it gave me such a sense of relief because all this time as I’ve been watching productivity YouTube for several years out of college, I thought waking up at 5 AM was like this one elusive thing that if I could only bring into my life everything would be different. I’d be happier and more productive, more fit. And the reason maybe I was stuck in life is because I couldn’t get myself to wake up early. This was the one habit that was always a struggle for me. And I realized, you know, maybe some people were just not meant to be such dramatically early risers. And hearing the truth of what he said inside the challenge – you know, he didn’t make it a video where he said this changed my life. In 30 days waking up at 5 AM is changing my life, even though videos like that had been getting millions of views on YouTube prior to that. It was wonderfully refreshing to see. and so you can leave things unresolved. And this goes for a variety of topics. pretty much any style of content that you’re making. If you leave things unresolved And if you see the truth, even if it’s ugly, it’s just nice. It gives the sense that there is a real person on the other side of the screen who’s watching what you’re saying. And when you speak the truth to them, It makes you so much more likable as a creator. and being likable and being honest and authentic, It’s actually just good for business.
The third idea, very similar to the prior ones, is to be imperfect. Lately, I’ve been wanting to get more into fitness content, even though you know I’m ultimately not that fit. In fact, I have way more experience being an unfit guy who would meet up with friends, meet up with the lads, have a couple of pints, and not really prioritize working out or strength training. these last six months it has become a huge interest of mine. And even though I’m not all that fit, I was feeling a little bit sheepish at first about making videos like this. But my videographer, some of my friends, they made a good point. In a way, it’s even better, more compelling to be a sort of unfit or just average fitness person on the journey to good health than it is to be this perfectly fit ab-tacular all knowing fitness influencer, who’s telling viewers what to do. I mean, there’s a bunch of content creators like this on the platform and some of them are great.
But it doesn’t take away from your strength as a creator, to not be an expert. What you can do is sell yourself as on a journey. You’re on the journey with the viewer to discovering great health and that can be a great strength of yours as a creator actually. You could be on the journey to finding success alongside your viewer to make something incredible happen.
There’s one last point that sort of ties all of this together. And that’s to be consistent. Authenticity it’s something that you can build up with a viewer over time by staying consistent. In fact, there’s many things we covered over this course like making a shot-list, writing a great script, being original and now being relatable that it actually is an iterative process. You can’t really expect to master these ideas right away. But what you can do is tell yourself, I’m going to keep generating new ideas. I’m going to keep coming up with ideas and just the process of learning how to execute on an idea. You come up with something, you make it. You try to minimize the gap between a thought that might come in your head about a video you want to make a video that you could be really excited about figuring out what shots are needed, what the script will look like, how you can tie in different storytelling elements like the sound design, the music, the edit the pacing, and now how you can make things relatable by always coming back to the truth, always coming back to an authentic source of communicating something.
Practicing all those things consistently is actually what is going to make you a great creator. James Clear had once said something to the effect of (see how I’m getting credit?), he said something to the effect of, ‘people think that to get to the next level of success you need to do new things. And sometimes that’s true. But oftentimes what you actually need to do is just keep doing the five things that you’ve been doing all along to get as successful as you are now. The main thing is to just keep doing them.’
So often the difference between failure and success or success at a good level and then getting to an exceptional level is just to press on and to keep making the thing to keep doing the thing to keep working the system. And so all of these principles, they only work and they only work better and better for you if you stay in the game if you stay on the journey and you’ll find that the more you make the more you do, the more you practice these ideas, the better you get at being authentic and developing your ideas and in turn being a great creator.
We hope you enjoyed this course. Artlist is one of my favorite platforms both for stock footage and for music. And so we hope this has been helpful on your journey to developing great ideas and executing them. That’s it for me. Greatness is coming. Cheers.
Transcript
Hi, guys. Jordan, with Motion Array, and today we’re going to be sharing with you our best tips to getting great videos while working remote or working from home.
Regardless of why you’re making videos remotely, it seems like it’s a trend that’s not just here for the present, but it’s going to continue to become the norm as time goes on. So learning how to make your videos quickly, effectively, and with a high level of quality is going to be an invaluable skill to develop in the long run. So we wanted to share with you our personal best tips to making awesome videos from home to hopefully make your life a lot easier.
And we’re going to start out with number one. Write your script on a Google Doc. First of all, I hope it’s pretty obvious why writing your script out at all beforehand is a great idea. But writing it on something like a Google doc is essential so that other members of your team can actually view it, to ensure that you’re not going off track, and to make sure that everybody is on the same page. If something seems off, this gives them the opportunity to voice their concerns ahead of time. The only thing worse than somebody telling you, ‘Oh, that’s not what the plan for the video was.’ Is being told that after you’ve already filmed everything. So get a plan written down and share it with your coworkers so that they can leave comments and edit and help to make your video as good as it can possibly be. And even if you’re the only person who needs to sign off on what you’re doing, it’s still always a great idea to get a second pair of eyes on your work to help make sure that you haven’t missed anything or overlooked something. And even if you’re the type of person to just go off the cuff and ramble in front of a camera, shoot things in the moment and see where it goes, it’s still a great idea to have a skeleton structure of things like goals and objectives to really help establish things like tone.
Step two: Get your light right. Making videos from home can cause a lot of challenges for people, but what are the most common frustrations seems to be people lighting and filming themselves. Your natural inclination might be to try to get a professional three-point lighting setup, but at home, you might not have access to lights like these. So we wanted to share with you some of our tips to getting great lighting without spending a dollar on anything. Whenever possible, it’s great to use a window to get natural, beautiful light hitting your subject’s face. Always make sure that your subject is facing the window as directly as possible and filming them from in between them and the window. That’s what will get you a clear, bright, even lighting set up just using the sun. Turning it around so that your window is at your subject’s back is going to get you this result instead. Exactly the opposite of what you want. Not the best.
But for sure, there’s going to be times when either you’re filming at night or you don’t have access to a nice, bright window, so what do you do instead? Well, in that case, the thing that you want to absolutely avoid is ceiling lighting. Anything that’s lighting you directly from the top down is going to give you this sort of look, which does not look good. This kind of lighting is absolutely not flattering to anybody’s face, so the way to get around this is to find a lighting source that’s closer to the height of your subject’s head. You can see that simply by taking an ordinary lamp and sitting down in front of it, you already get a much more pleasing look. And having a light that’s movable also gives you the opportunity to choose where you’re going to film and select a background that’s most pleasing to look at. Now, when choosing what’s going to be in the frame behind you, there’s a clear balance between too much and too little. A busy, distracting background is easy to see why it would be undesirable, but a plain white wall might also not look the best, either. When figuring out where is going to be best to shoot, your limitations are going to be partially dictated by your home. But some things that look really good to help get you started thinking or framing and symmetry, things happening around your subject, as well as things happening roughly equal on both sides of your subject. Having balance in your shot can actually help your viewers’ eyes to stay more in the center of frame where you are, giving whatever information you’re giving. Another last little thing that you can add is some light in your background to show that there’s actually some depth within your image. Just make sure that it doesn’t overpower the rest of your shot. A well-placed, cheap lamp might actually do more than you can ever imagine.
And once your image is dialed in, you’re going to want to make sure that your sound is also to your liking. The absolute best way to get better-sounding audio is to have a microphone that’s completely separate from the one built into your camera and getting it as close to your subject’s face as possible, but without getting in your frame. But if you want it to have it completely visible in your shot, that’s OK, too, as long as it suits the look that you’re going for. The difference is insane. So if we turn off this microphone here, you can hear what the audio sounds like coming straight from the camera. It’s gross by comparison. So let’s go back to what this microphone sounds like here. It literally gives me a feeling of relief hearing such an amazing difference.
But if you don’t have a microphone like this or a lavalier microphone or shotgun microphone, and you’re not willing to spend the money on any of these, then what do you do to at least make your audio sound better? The first step is to take a listen to the area around where you’re recording. Are there things making a lot of noise that you need to either turn off place in a different room or eliminate altogether? This is going to be the first step, regardless of whether or not you have an external microphone. But the next thing you’re going to want to see is if you have a room that has few reflections. Not visual reflections, audio reflections. Hard surfaces, bounce sounds around, and get it to echo. But having things in a room like carpets, couches, blankets and even things like paintings and wall artwork will have an impact on your sound. The softer an object is, the more it’ll help to absorb stray sound and help your audio sound at least a little bit better by not echoing. But you can also take us up another notch by taking a blanket, for example, and hanging it up near your subject off camera to help rein in any reverb.
But I’m guessing if you’re like most people, you probably have a phone. And if you’re not using it to record your video in the first place, you can actually set it nearby your subject and have it record your audio. An iPhone, for example, has a voice memo feature that captures better audio when your camera microphone likely will. So to show you what I mean, this is the audio that’s coming straight out of my camera, and this is the audio that’s being recorded from my phone. It’s at least better, isn’t it?
And if you have one of these standard sets of Apple Earbuds lying around, they actually have a microphone built-in right here. In a pinch, you could use it to capture better sound if you don’t mind things dangling from your ears. As long as you’re not shaking your head around you rapidly, this is a great option for an external microphone at no additional cost. And you just have to record a voice memo and sync it up afterwards in post.
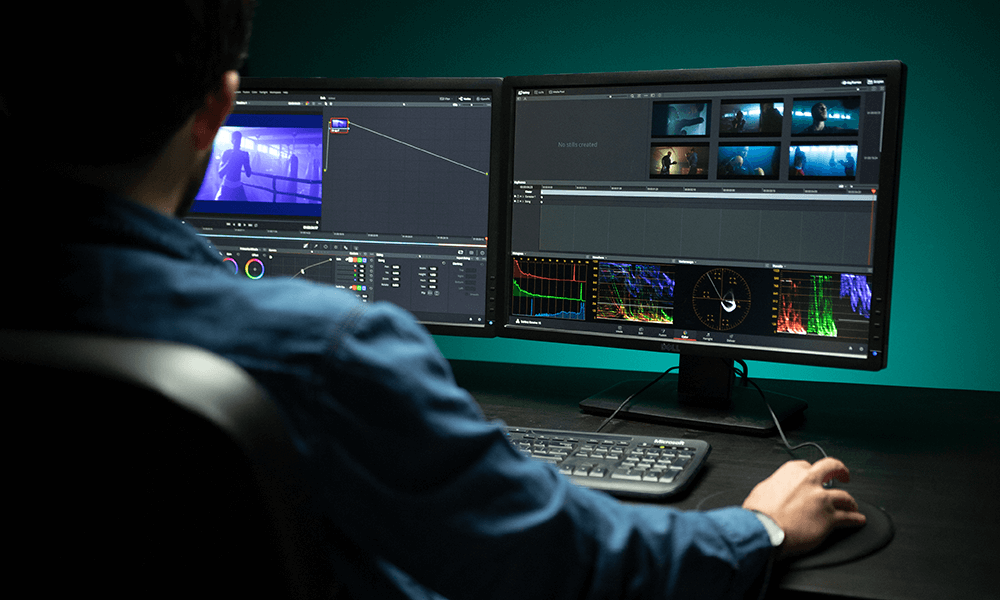
And finally, speed up editing by getting your videos reviewed faster. Editing can be a big task. We literally have hundreds of different videos on different parts of the editing process. So if you’re interested in any of those, we have playlists and walkthroughs and tutorials for different pieces of software like Premiere Pro and Final Cut. But if you’re not used to working from home, one of the most frustrating things can actually be getting your project reviewed and approved by your team. First, it can take forever to send over a big file. Then, it can get really confusing when they say things like, ‘Hey, change the length of the shot with that guy,’ and you’re like, ‘But there’s three shots that you could actually be talking about, which one?’ ‘Oh, the shot at 3:02?’ ‘But wait, are you talking about the start of the shot or the end of the shot?’ ‘Or, what are you talking about??’
You can cut out the garbage completely and get on the same page by using a video review system. You can upload your video project and send the review link to your collaborators. Here, they can watch your video and if they have any comments while watching, their comments will be linked to that exact time code on the video, so you know exactly what they’re talking about. And you can even click to add an annotation to make it even more precise. There’s this thing known as the 80/20 rule, where it seems like 80% of your project only takes about 20% of your time to actually do. But it’s that last 20% that seems to take 80% of your time to get everything polished up and finalized. Review helps to eliminate that helping you to be clear and concise with what exactly needs to get done to make your team happy and your video better. And once you’ve made those changes, you can upload your next draft as a new version so your team can see your progress, helping you to get your videos fully approved as quickly and easily as possible.
And guys, that’s it. I hope you found at least one of these tips helpful to making better videos from home. And if you like what we do here, feel free to check out all of our resources to help you make better videos. Thanks so much for stopping by, and I can’t wait to see you in the next video.