$29 $0
Special launch offer
All courses are 100% free for a limited time only!
Lessons
Play Video
Transcript
Shooting days can be a nerve-wracking experience. But with the right prep, you can ensure that the day goes as smoothly as possible.
We’ll cover: how to start writing your script, storytelling techniques and examples, which filmmaking gear you should invest in, tips for speaking on camera and engaging your audience, how to shoot great videos solo.
Get to the big day fully prepared and give it your best shot.
Transcript
Hi, my name is Austen Paul, and I’ll be your teacher for scriptwriting 101. So you want to start writing a script, but don’t know where to start. You feel overwhelmed with the daunting task ahead, and that’s okay because I’m going to walk you through the basics of scriptwriting and where to start.
The first and most important thing to know is don’t force the script. Allow creativity to come to you. But when creativity strikes, capitalize on it and build off of that. I personally carry a small notebook and pen around with me wherever I go. And whenever I have a big idea or a small idea, I write it down. And from there, I let it build.
For example, I could come up with an idea like a string of disappearances in a small town leads a washed-up detective into the underground sewers to find answers. This is also known as a logline and a great place to start formulating your script.
A logline is a brief summary of your story. Typically one sentence long. In this logline, we have already so much information to work with. We have our protagonist the detective, who is the main character of our story. We have the antagonist, the murderer, who is the villain of our story. We have the goal for our detective to solve the murders and uncover our antagonist. And lastly, we have our conflict, the unanswered disappearances.
After creating a logline and coming up with the basic idea for our script, I like to use a method called The Story Circle by Dan Harmon. Dan Harmon’s Story Circle is split up into eight steps for you to build your story and a great way to work through your script. The Story Circle’s eight steps are one – a zone of comfort. Two – they desire something. Three – enter an unfamiliar situation. Four – adapt to the situation. Five – get what they desired. Six – pay a heavy price. Seven – a return to their familiar situation. Eight – they have overall changed. These eight steps will dictate the path of what your protagonist will do throughout your story.
So let’s start building our story circle. One – a zone of comfort. This is the protagonist’s day-to-day routine before being introduced to the events that will unfold. For example, our washed-up detective once great at his job is now an alcoholic, barely attempting to try at his job, let alone his life. He’s alone and his wife and daughter have both left him. Even though this is uncomfortable, this is a zone of comfort for our detective because this is the life he’s been used to for many years.
Let’s do the next step. Number two – they desire something. In this section, our protagonist desires a goal that they will achieve at all costs. We already know the goal from our logline, but can detail it even more and give reasons for his goal based on our character we built so far. For example, the detective uninterested in the missing people popping up around town suddenly wants to solve the case when a little girl that reminds him of his daughter that left him goes missing.
Number three – enter an unfamiliar situation. Now our protagonist must enter an unfamiliar situation, a situation that is beyond their control, that drives their story forward. For example, our detective now in a state of caring, must battle his inner demons as he focuses on this case. He gets wind of weird sightings outside the water tunnels that run underground throughout the city and must enter them to find the girl.
Number four – adapt to the situation. Our protagonist must adapt to the new situation that he’s put himself in. For example, in the tunnels, finding his way farther and farther from civilization, our detective gets lost. He slowly starts to run out of the alcohol he brought with him, facing withdrawal and uncomfortable memories he’s buried inside himself. He must fight through the pain. As he knows, there’s little time to save this girl’s life.
Number five – gets what they desire. At this point, our protagonist gets what they have desired. For example, the detective finds the girl and is able to save her life. But not without paying the price.
And number six – pay a heavy price. The protagonist gets what they wanted but must pay a price for their reward. While fighting off the withdrawals, the detective discovers a true reason his wife left him. He allowed the killer to previously walk, which caused the deaths of multiple people.
Number seven – return to a familiar situation. Now the protagonist returns to their original life. The detective is hailed a hero as he safely returns the little girl to her family, returning the town slowly back to normal.
And lastly, 8 – they have changed. Even though our protagonist has returned to a normal life, they’ve changed because of the journey that they have overcome. For example, the detective learns to cope with the truth on what he has done and learns to forgive himself for the murders of the other victims. He’s able to stop drinking and starts to rebuild his life. Ending with him, with flowers in his hand, knocking on the door of his ex-wife’s house. And that’s the Story Circle.
This Story Circle is a great foundation for a script and has now given us a very solid foundation to work off of. Think of the steps as the main points that drive our story and everything that will be written in between will help lead from step to step.
Now let’s build on our main characters. This is an important process in scriptwriting because it’ll help determine the dialog, actions, and outcomes of our characters in each scene. We can already take a lot of information from what we’ve created so far.
Let’s start with Dan Carter, our protagonist. His occupation: detective. Location: small town in Flora, Mississippi. His age: 35 to 43.His backstory: once a successful detective in a bigger city, he was too reckless and too aggressive, which ended up overturning a case where the man that was guilty got let free. He was put on suspension from his job. So him and his family packed up and moved to the small town of Flora, Mississippi. There he faced a day-to-day boredom and shame of his last job. The end of his work routine slowly required more frequent stops at the bar before heading home. Alcohol started to overtake his life and he wasn’t there for his wife and daughter. Fighting with his wife, Louise Carter, more often, she eventually had no other option but to leave him and take their daughter, Jenny Carter, who was seven, with her and move far away. This sent Dan in a deeper spiral, where he became bitter with life caring less and less about his job and his health.
And lastly, we can talk about his characteristics. He’s tough. He’s a good detective. He’s an alcoholic, but he’s overall morally good. This back story and details may seem unnecessary, as a lot of it will never come up in the actual script. But again, this will help you write and determine your character’s actions in each scene. I’ll let you build the rest of your characters. Make sure you do this for every main character in the script. Also, this doesn’t have to be done right away. You can let your story unfold and the characters themselves tell a story as it goes on. As I stated from the beginning, there are many different ways to write a script and this is just one of the techniques.
The famous writer Stephen King once said, “I never know the ending of my story when I begin writing it. I allow my characters to tell the story and determine where to take us.” And even with the rough outline that I’ve created so far, my story can change from revision to revision. Maybe I want the antagonist to be aliens, or maybe the government maybe our protagonist isn’t led into the sewers, but into a different dimension. As you write, you’ll run into roadblocks and you’ll have to rework your script and write what fits best for your imagination.
Now it’s time to begin writing the script, and the best way I like to do that is by using a scriptwriting software. Luckily, there are quite a few out there, and there are quite a few with free versions. Two scriptwriting softwares that are commonly used are Final Draft and Celtx, both great in their own way. But I’ll let you do your own research on what works best for you.
Now, I’ll show you the basic outline on how to format a script. There is an industry-standard for formatting your scripts and you must do it properly if you want you and your script to be legible and taken seriously. Luckily, most softwares are formatted for this, so it takes a little bit of guesswork out. For each scene, you’ll start with your headline or slug, where and when the scene is taking place and we will format it like this. If it’s inside, you’ll start with INT. period for Interior, or if it’s outside EXT. period for exterior.
Next you will write the locations, like the doctor’s office or Dan’s house or town square. And lastly, you will write the time of day. For example, day, dawn, night, and so on. Next, we’ll write the action. This is the description of who and what is in the scene. You’ll want to communicate the best you can the look and feel of the scene. For example, I could write something like this: Hazy light beams from the sun hit the interior office of the detective’s messy desk. The office is worn out and disorganized. Dan, sitting in his chair, had his head laying on the desk, trying to nurse his intoxication. But a rattling fan keeps spinning, breaking the peace and silence that he’s seeking.
Next, we will write the dialog. First, I’ll start with the character’s name that is speaking, for example, Dan and make sure you put it in all caps. Dan says, “Ughh.” Then depending on if there is dialog with another character, you would write the next character’s name in dialog. If not, you can go back to the next action. We will continue the action since Dan is alone, for example, you can say Dan rolls his head overlooking directly at the fan as if mocking him. As if defeated by the fan, he reaches into the top right drawer of his desk, fumbling around, pushing empty mini bottles of whiskey around. He finds one with a few drops left in it. He opens it up and holds it over his head to shake out the remaining two drops. He tosses the empty bottle back into the drawer and gets up to grab his coat and leave. But his desk phone rings.
All right. Now we can go back to the dialog. We can add a parenthesis right after the name and right before the dialog like this to convey the character’s intentions clearly. In parentheses: Exhausted. Then Dan says: “Sighs.” Now back to the action. He takes a second and walks over the phone. Now back to the dialog. Dan says, “Yeah.” Now we switch to our character on the phone. We’ll put their name, then in parentheses O.S for offscreen. This means a character is in the scene but off camera. Or you can put V.O for voiceover, meaning the character’s not in the scene, but you can hear them like a narration.
For example, Sergeant Bill Dunningham. O.S (angry) “My office now.” Back to Dan, “Sarge, I was actually about to…” Back to the sergeant, “If you aren’t in my office in the next minute, your ass will be looking for a new job so fast you won’t know what hit you.” Now back to Dan, “Yes, sir.”And now we can finish with the action. Dan hangs up the phone and walks over to the inner office window and using his two fingers, peers through the blinds across the sheriff’s department to Sergeant Bill Dunningham’s office, where you can see him visibly upset behind the desk. Dan takes a breath, grabs his coat, and exits the office. And that will do it for our short scene.
Here are a few key takeaways when writing your script. Don’t be too hard on yourself, with your first draft. You’ll write and rewrite and write some more. And most scripts that become movies have had more drafts than you can even imagine. When you’re struggling or hitting a roadblock, take a break and go for a walk and recenter yourself. Working under stress will never produce the results you want. And lastly, practice-write as many scripts as you can. Most famous writers talk about their first few scripts and how terrible they are. It takes a lot of practice to become great at this process. And a lot of learning along the way.
Good luck with your scripts and allow your creativity to take you wherever you desire. That’s it for scriptwriting 101. Join me for the next one.
Transcript
Does gear matter?
Hi, I’m Anthony from the YouTube channel Anthony LiPani, talking about the age-old question that will forever be argued in a world of content creators – does gear matter? Some people believe with all of their heart and soul that it does, and there’s no convincing them otherwise. And some people feel the complete opposite. The reason that this question will never have a straightforward answer is because the real answer is not yes or no. The answer is- it depends. I can make a compelling case for both sides of the coin, and I will.
Number one, let’s just get this out the way immediately before we even start. Your gear is not a flex move. It’s not there to make you feel good about yourself for having the latest, greatest, and most expensive. Nobody will know the make, model, and price of your camera simply by watching your videos unless you tell them. Don’t treat your camera gear like it’s a flashy new car. It’s a tool that exists for delivering specific features to specific people that need those features in order to get the job done properly.
Now that we got that out the way, let’s get to the question at hand. The reason my answer is it depends is based on what type of content you are creating and what you visualize your videos looking like when they’re finally uploaded. For example, if you want to deliver super cinematic videos with high-quality footage that looks like a movie with amazing audio and super slow-mo and aerial shots and shallow depth of field, a.k.a. blurry backgrounds. Then the answer is absolutely yes. Gear definitely matters.
You’ll need the proper tools to help you achieve all of that. It’s hard to get a drone shot without a drone. For good audio, you’re going to need a good microphone. And even though some smartphones do do a decent job at blurring out the background, it will never look as good as actual shallow depth of field from a real camera and a good lens. Besides YouTube, I also shoot weddings, corporate events, music videos, and promotional videos, so it makes sense for me personally to own top-shelf camera gear.
One of the biggest mistakes I see time after time is people assuming that the most expensive cameras will skyrocket their channel to a new level. And the fact is, this couldn’t be further from the truth. There’s a pretty popular creator on YouTube called Mr. Beast. You might have heard of him, he only has like 90 million subscribers or so. No big deal. And believe it or not, creators like Mr. Beast and David Dobrik don’t use the latest, greatest, and most expensive cameras on the market on purpose. They intentionally shoot on lesser-quality cameras to appear more relatable and down to earth.
Now, I’m not saying that this is a recipe for success. I’m simply just making a point. Different niches and styles are for different types of gear. There’s vlogging and travel channels with millions of subscribers that mainly shoot the majority of their content on either an action camera or a smartphone. And there’s also vlogging and travel channels with millions of subscribers that film on high-quality cameras. Both in the same field, putting out similar types of content but using completely different types of gear.
So what does this tell us? It’s all about the content itself. It’s more about what you’re delivering than what gear you use to deliver it. Now, again, if you want all the bells and whistles in your videos, then yes, you’ll need more gear in your arsenal than just a smartphone or an action camera. But take it from me, there’s this sense of creative freedom when you’re out shooting for the day on just an action camera and a few spare batteries. There’s something special about pointing your camera anywhere and simply pressing record without having to worry about settings or autofocus or anything really. Not to mention the more gear you own, the more you have to lug around with you.
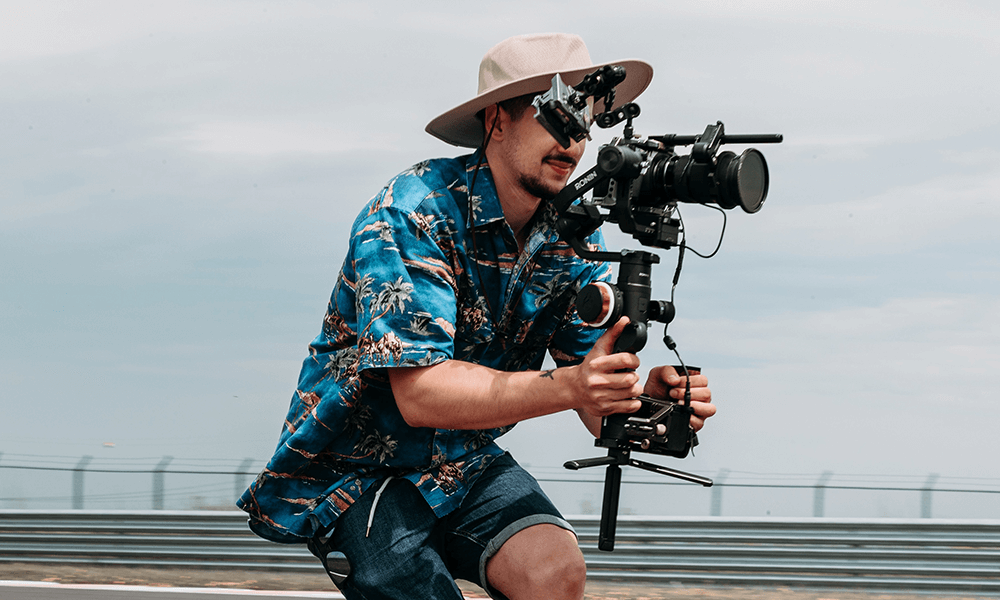
When I go on a shoot like a paid event, I’m carrying two cameras between two and five lenses for different types of shots, ND filters, which are like sunglasses for your camera lens for when it’s too bright, like when you’re filming outside on a sunny day, some spare batteries, some lighting in case I get caught in a low lit situation, a drone, spare batteries for my drone, a gimbal to stabilize my camera for super smooth footage, a microphone for cleaner audio because good audio is very important for video.
It’s a lot. For me all of those things are necessities, but sometimes when I’m shooting for my channel, I just go out and vlog on my GoPro, a nice long selfie stick, and maybe my drone. And not only is my job easier, but it’s also more enjoyable and faster because there’s basically nothing to set up or worry about. You need to think about what kind of content you plan on delivering as well as your budget and then go from there. Just remember, gear does not make or break you. It’s there to help you. You still have to use this, and you still have to use this.
Thanks for watching. I’m Anthony LiPani, and I’ll see you next time.
Transcript
In the beginning of your content creative career, the idea of preparation might seem a little overwhelming and confusing. It does for all of us. But one of the great parts about content preparation is, there’s no rules to follow. It’s all about what works best for you. Don’t be afraid to look at other content creators to help you with inspiration for some ideas or methods that you can add to your own repertoire. as you go you’ll pick up little techniques here and there that resonate with you, to help you increase your productivity. And you’ll slowly start to develop a solid workflow that you can rely on to help you get the job done better and faster.
Some people like to fully script out their projects, which could significantly speed up the completion of your videos. But if you’re not careful, reading the script line for line can cause you to come across as robotic and just not natural on camera. Another method is to not fully script your videos but instead use bullet points. This strategy is probably best use for somebody that’s more comfortable on camera and speaks well off the top of their head.
But just like a fully scripted video, there are some things you need to be aware of with bullet points. You’ll most likely need to redo more shots without a script than you would with one. You also have to be aware of fluff. If you’ve never heard of the term fluff before, it’s basically filler words in between your sentences that add zero value to your project. Words like ‘umm’ or ‘uhh’ as well as awkward silent seconds in between your lines are what’s called fluff, which can occur pretty often when you’re shooting from the hip. Always cut out the fluff. People’s attention spans are incredibly short, and leaving fluff in your videos is an easy way to lose your viewers’ attention fast.
Another situation you might come across when using bullet points is making a mistake that you might not realize you made while filming, but you’ll notice it later on when you’re editing your video, and by then it might be too late to redo your shot. For me, I mostly use bullet points because I’m pretty good on camera and I find that come up with funnier jokes off the top of my head during my shoot. But I will script out some super detailed projects, like an in-depth review I might be working on, or paid sponsor project, and I want to make sure I don’t leave anything important out.
Now, a little earlier I mentioned that there are no rules when preparing for your video, and I’d like to explain a little bit. Some people use an app, others like to go old school with a pen and paper. I myself like to use a notes app because most notes apps are cloud-based and can sync up with all my devices so I can access them at any time and there’s no chance of me losing what I wrote down. I find that if I use a physical piece of paper, there’s a much higher chance of me not bringing that paper everywhere I go, which will limit my filming times and also I’ll probably lose it.
When I’m writing in my notes app I script on my projects much different than I’ve seen other people write theirs. I use checkboxes for my lines like you would see for a to-do list or shopping list. It helps me not lose my place in my script and I’m able to check off my lines as I go through them. It also helps prevent me from over-explaining something, which is another good way to lose somebody’s attention fast. And if you’re the only one reading your notes, then your style of writing notes won’t matter as long as they make things easier for yourself.
Another method I use is I spell my words in a way that I know I would naturally say them. I’m an Italian city boy from Queens, New York, and as you might be able to hear, I got a little bit of an accent, so I spell my words in my script with my natural accent. For example, if one of my lines is, “what do you want to do?” I know that I’ll sound weird accentuating the T’ in “want” and “to do” So I’ll write instead, “whatta you wanna do?” to make sure I sound natural when I speak my lines because that’s how I pronounce my words. This technique helps me immensely when I’m working on a project that requires a full script.
Another great tip if you find yourself struggling on camera, is to film in a place that makes you feel more comfortable. This could be a bedroom, a basement, maybe an attic that nobody’s using. Maybe even go on a hike somewhere by yourself and just hold the camera up and speak. And don’t assume that everything you film has to be seen by the world. If you don’t like something, you can simply cut it out or completely redo it or delete it. Practicing over and over will make you feel more comfortable and help build confidence in front of the camera.
And don’t forget to speak up. Try not to mumble or some monotone. Pretend the camera is one of your friends that you enjoy having a conversation with. And if you make a mistake, just have patience until you get it right. Don’t panic. There’s been plenty of times where I’m just having an off day and my brain isn’t working as well as I wanted to. We’ve all been there. Don’t get frustrated. Just gather yourself, keep going until you get it right.
Being a creator is the same thing as going to the gym or being in a relationship. The more you put into it, the more you’ll get out of it. And there’s no better time to start than right now. Thank you for watching, and I’ll see you guys next time.
Transcript
If you’re just getting into filmmaking, you probably don’t have access to a film crew, and it can be difficult to make videos by yourself. Once in a while, you can rely on family and friends, but sometimes you have to take things into your own hands. Let’s take a look at a few tips to make things easier for you.
Tip number five is to buy a tripod. You can avoid doing this to save money, but at some point, you need something reliable to hold the camera. The cost for a tripod can range from 15 to hundreds of dollars.
Tip number four is find a way to view what your camera is seeing. Purchasing an external monitor is an option. But first, take a look at what your camera offers. For example, Canon has the EOS utility software, which lets you bring up the camera view on a laptop. The Panasonic GH5S, which is what we use as an image app to show it on your phone or tablet. You’ll probably also be able to control certain aspects of the camera through the interface, like the aperture, ISO or focus. This makes it much easier to fine-tune your shot without having to walk back and forth to the camera.
Tip number three is to film creatively. Now, it’s easy to advise someone to be creative, but it can be harder to actually do it. As an example, take the White Walker tutorial we did a while back. I filmed this by myself with a 50-millimeter prime lens, which had a really shallow depth of field. I found it difficult to walk into the shot and stop at exactly the right spot in order to stay sharp, and I didn’t have anyone else to work the focus ring. So instead, what I did was stand in front of the camera, set my focus, and then walk backwards out of the shot. I reverse the footage and you couldn’t tell the difference. Also, that green side light you see on my face is actually me holding my iPhone on my right shoulder with the flashlight turned on. I didn’t have a stand or light available, so I had to improvise.
Tip number two is zoom out. This one applies more if you don’t have a way to see what your camera is viewing. Once you frame up your shot and get it looking just right, zoom out a bit if you can. This prevents you accidentally cutting off important information in the frame, which can’t be recovered in post. It’s better to have that extra room and reframe if needed.
And tip number one is to plan ahead and don’t skip out on pre-production. It’s easy to think of a bunch of different creative shots in your head, only to get to the set and realize that you can’t do any of them without extra help. So when you create a shot list or a storyboard, make sure that what you’re planning to do can be done with one person. I’ll see you all in the next video.
About this course
Shooting day can be a nerve-racking experience, but with the right prep, you can ensure the day goes as smoothly as possible. Learn which equipment you’ll need to record your videos, how to speak confidently on camera and how you can film amazing videos, even if you’re shooting solo. Get to the big day fully prepared and give it your best shot.
What you’ll learn
- How to start writing your script
- Storytelling techniques and examples
- Which filmmaking gear and equipment to invest in
- Tips for speaking on camera and engaging your audience
- How to film great videos without a film crew
Course instructors
NYC-based filmmaker and content creator focused on tech, storytelling and comedy.
Learn moreAmerican filmmaker, travel enthusiast and founder of a leading full-service production company.
Learn moreA team of in-house filmmakers, video editors and content creators from across the globe.
Learn more

Similar courses

- 32min
- Intermediate
$29 $0
Artlist Creative Team
- 1hr 14min
- Beginner
$59 $0
Sam Holland